
January 29, 2026
Create a guide: how to create step-by-step guide that actually gets used

Discover how to create step-by-step guide that teams actually use. Turn screen recordings into interactive, adoption-boosting guides.
To create a step-by-step guide that people actually use, you have to move beyond static documents. The modern approach isn't about writing more, but about capturing a real workflow and letting AI turn it into something dynamic and easy to follow. This is how a guide becomes a real asset, not just another forgotten file.
Why Most How-To Guides End Up Collecting Digital Dust
Let's be honest. That folder on your shared drive labeled “SOPs” or “Process Docs”? It’s probably a digital graveyard. Most process documents are created with the best intentions, shared once in a meeting, and then left to become instantly irrelevant.
The problem isn't a lack of effort—it's that we're still relying on formats that are fundamentally broken. A text-heavy Word doc is a chore to create and even more of a pain to follow. A wall of text peppered with a few outdated screenshots is more likely to overwhelm a new hire than empower them.
These old-school guides just don't create consistent workflows. They lead to painful onboarding and the same questions getting asked over and over again.
The Failure of Traditional Formats
We’ve all been there, trying to follow instructions that don't match the software we're looking at or describe a process that changed three months ago. Old methods just don't work for modern teams.
Static Documents: They’re a nightmare to update, you can't track who's using them, and they go stale almost immediately.
Long Video Recordings: A five-minute screen recording seems helpful, but it forces users to constantly pause, rewind, and re-watch just to find one simple step. There’s no way to skim for the important parts.
Lack of Accessibility: When guides are buried in shared drives or old email threads, finding the right one at the right time is half the battle.
This is exactly what that digital dust collection looks like in practice—a chaotic folder that creates more confusion than clarity.
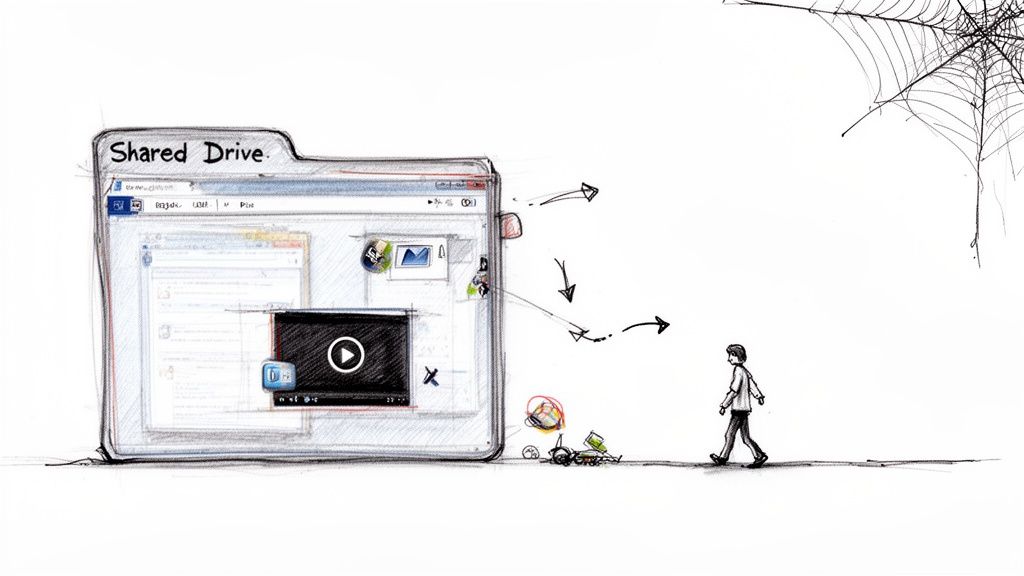
This image nails the chaos of using traditional storage for critical knowledge. It’s a system that fails both the people making the guides and the people trying to use them. It's one of the biggest SOP mistakes that make guides useless.
A Modern Approach to Guide Creation
The fix is to stop creating static artifacts and start building a living documentation system. Imagine turning a quick five-minute screen recording into a fully interactive, AI-powered guide. This approach can automatically break down your workflow, capture the right screenshots, and generate the initial instructions for you.
By transforming process documentation from a chore into a strategic asset, you create a single source of truth that grows with your team. This isn't just about better documents; it's about building a more consistent, efficient, and scalable operation.
This method lets you create a step-by-step guide that’s not only fast to produce but also simple to update and genuinely engaging for your team. Instead of a forgotten document, you get a valuable resource that actively drives consistency and growth. It's the foundation for the practical steps we'll walk through next.
Planning Your Guide for Maximum Impact
Before you even think about hitting record, take a moment to plan. This single step is what separates a guide that truly helps from one that just adds to the confusion.
Jumping straight into recording without a plan is like starting a road trip without a map. You’ll probably end up somewhere, but it’s unlikely to be where you intended. A little prep ensures every click and action you capture has a clear purpose.
The whole thing starts not with how, but with who. Who is this guide actually for? The answer changes everything. A guide for a brand-new hire needs to be way more detailed than one for a seasoned teammate learning a minor software update.
Define Your Audience First
Understanding your audience is the absolute foundation of a great step-by-step guide. You have to get inside their head and see the process from their starting point. Are they a new client, a tech-savvy internal user, or a non-technical manager?
Ask yourself these questions to get a clear picture:
What’s their current knowledge level? Are they total beginners who need every single icon explained, or are they experts just looking for a quick reminder on a specific workflow?
What’s their main goal? What problem are they trying to solve? Knowing this helps you trim the fat and focus only on the steps that matter.
What language do they use? Ditch the internal jargon if you're making guides for customers. Stick to terms they'll recognize instantly.
Nailing these answers lets you tailor the guide's complexity, tone, and depth. It’s how you make sure it connects and delivers value right away.
Map Out the Core Process
Once you know who you’re talking to, you can sketch out the process itself. Don't try to capture every possible detail in one go. A great guide has a clearly defined start and an equally clear finish line.
Think of it as a short story. The beginning is the trigger action (like "logging into the CRM"), and the end is the successful outcome (like "the client record is now updated"). Every step in between should move the user closer to that goal.
A common pitfall is trying to document a huge, sprawling workflow in a single guide. Don't do it. Break it down into smaller, focused tasks to keep users from getting overwhelmed.
Mapping the process also helps you spot the tricky parts ahead of time. Where are people most likely to get stuck or confused? Those are the spots where you’ll want to add extra detail or a helpful tip later on. The core principles of creating clear, step-by-step instructions are also a huge part of learning how to make study guides that actually work.
Assemble Your Assets Before Recording
Nothing kills the momentum of a recording session faster than fumbling around for the right login, a piece of sample data, or a specific file you need to upload.
A smooth, uninterrupted recording makes for a clear, easy-to-follow guide. Before you start, run through a quick pre-flight checklist.
Your Pre-Recording Checklist:
Asset Type | Example | Purpose |
|---|---|---|
Login Credentials | A test user account for your software. | Avoids showing sensitive personal or company data. |
Sample Data | A fake customer profile or project file. | Lets you demonstrate the process without real info. |
Required Files | A sample spreadsheet to upload. | Ensures you don't have to stop recording to find a file. |
Clean Environment | A browser with irrelevant tabs closed. | Keeps the focus on the task and looks professional. |
Taking just five minutes to pull this stuff together makes your recording session incredibly efficient. This little bit of prep helps you capture the workflow perfectly on the first try, saving you the headache of re-recording. It's a small time investment that pays off big in the quality of your final guide.
Capturing Your Workflow the Smart Way
This is where your guide starts to come alive. Capturing your workflow isn't just about hitting "record"—it's about creating clean, clear source material that AI can turn into a brilliant first draft. A little prep work here goes a long way, whether you're recording a new process or using an existing video.
Think of your screen recording like the foundation of a house. If it’s messy or unstable, the final structure will be weak. A clean recording gives the AI the best possible input to work with, which means far less editing for you later.
Setting the Stage for a Perfect Recording
Before you start, take a minute to prep your digital workspace. This small step ensures your final guide looks professional and keeps the user's attention exactly where it needs to be. A cluttered screen is a distracted user.
Close Extra Tabs and Apps: Get rid of anything unrelated to the task. Your audience only needs to see what’s relevant.
Silence Notifications: Turn off pop-ups from email, messaging apps, and other software. An unexpected alert can interrupt your flow and distract from the core instruction.
Use a Clean Browser Profile: Consider using a guest profile or a dedicated work profile. This avoids personal bookmarks, extensions, and saved logins from showing up.
This infographic breaks down the essential planning stages that lead to a successful recording.
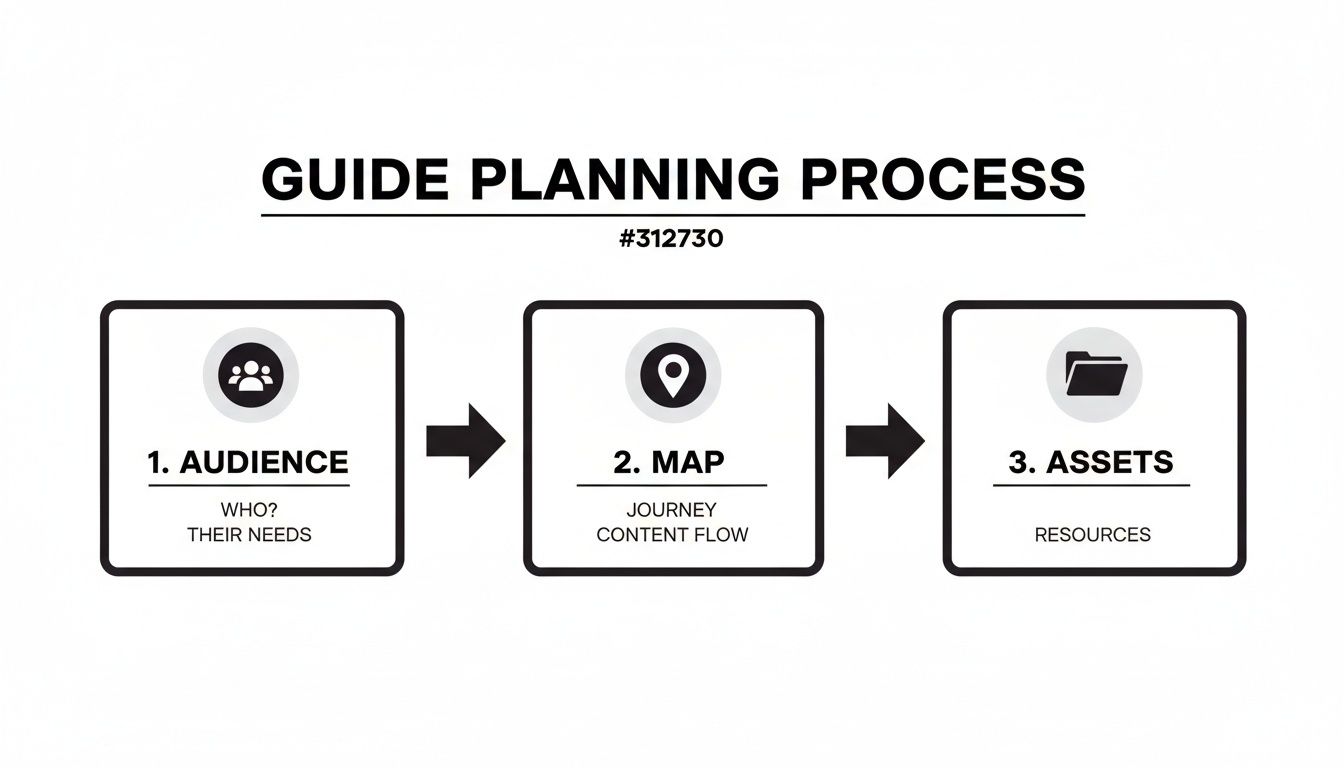
As you can see, a great capture starts long before you press record—it begins with understanding your audience and mapping out the process.
From Raw Recording to Polished Draft
Once your clean recording is done, the real magic happens. Instead of manually transcribing every action and taking dozens of screenshots, modern platforms use AI to do the heavy lifting. This is a massive advantage when you need to create a step-by-step guide efficiently.
You just upload your video or finish your browser recording, and the system gets to work. The AI analyzes your actions—every click, keystroke, and scroll—and automatically breaks the entire process down into a structured, step-by-step format.
The AI doesn't just transcribe; it interprets. It identifies distinct actions, captures a high-quality screenshot for each one, and generates an initial text description. This turns hours of painstaking manual work into a few minutes of automated processing.
This automation is what makes it possible to record a guide once and use it forever, freeing you up to focus on refining the content rather than building it from scratch.
The Power of Automated Breakdown
This automated analysis is incredibly precise. For instance, a guide on how to take a web page screenshot is great for showing visual steps, but with AI, those screenshots are captured for you automatically at the perfect moment. The platform intelligently extracts each interaction, creating a draft that's already organized and visually rich.
This process has a real business impact. For example, healthcare providers using structured analysis can identify growth opportunities 30% faster. The same principle applies here; businesses with standardized processes documented in guides can cut onboarding costs by up to 40%, a huge win for teams where poor documentation is a major drag on efficiency.
What you get back isn't a raw video file, but a structured, editable document. It's a series of clear steps, each with its own screenshot and description, ready for you to polish. This AI-powered head start is the key to creating high-quality guides at scale, getting you from an idea to a shareable draft in record time.
Refining Your AI-Generated Guide for Clarity and Impact
AI gives you an incredible head start. It takes a raw screen recording and turns it into a structured draft in seconds. But that first pass is just the beginning.
The real magic happens when you layer your own expertise on top. This is where you refine, clarify, and add the kind of value that only a human can. The AI gives you the "what," but it's your job to inject the "why" and "how."
Think of the AI draft as a perfectly prepped canvas. It’s clean and organized, but it needs your experience to bring it to life.
Honing the Language in Your Rich-Text Editor
First things first: read through the AI-generated text. While it’s usually accurate, machine language can feel a bit literal or miss the specific terms your team actually uses. Jump into the rich-text editor and polish the descriptions for each step so they’re clear, precise, and sound like you.
Go through each instruction and ask yourself: Is there a simpler way to say this? Does this match the language we use with clients? This is your chance to swap out generic phrases for your company's unique voice.
Your goal isn't just accuracy—it's resonance. When someone reads your guide, it should feel like a knowledgeable colleague is walking them through the process, not a robot.
For instance, the AI might generate something generic like, "Click on the button labeled 'Submit'." You can easily refine that to, "Click the ‘Submit for Review’ button to send the draft to the client." It's a small tweak, but that extra context prevents confusion and gives the user confidence.
Adding Visual Enhancements That Guide the Eye
A great guide shows, it doesn't just tell. Visuals are everything, and enhancing your screenshots can make a world of difference in comprehension. This is how you direct someone’s attention to exactly what matters on a busy screen.
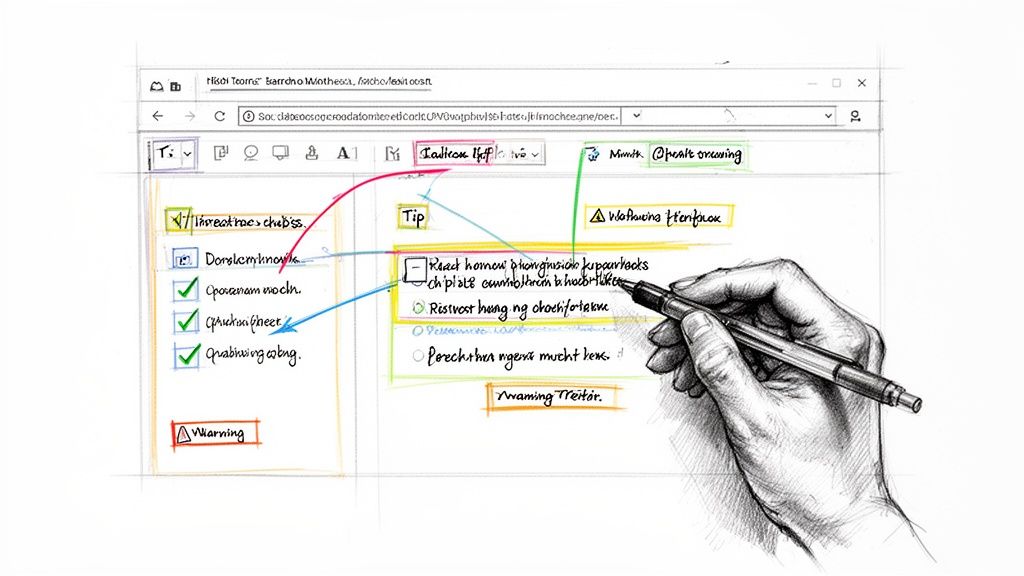
These visual aids are powerful tools for clarity:
Annotations and Callouts: Use arrows, boxes, or text labels directly on screenshots to pinpoint specific buttons, fields, or menus. It completely removes the guesswork.
Blurring Sensitive Information: If a screenshot accidentally captures customer data or internal details, a blur tool lets you protect that info while keeping the instructional context intact.
Interactive Checklists: For steps with multiple parts, adding a checklist helps users track their progress. It's a small interactive touch that boosts engagement and gives people a sense of accomplishment.
These features turn static images into dynamic instructional tools, making your guide far easier to scan and follow at a glance.
Weaving in Context and Expert Insights
This is the step that separates a good guide from a great one. You have process knowledge that an AI simply doesn't. Now is the time to add that invaluable context.
Did you know that businesses using structured step-by-step guides for market research can see up to 20% higher accuracy in their forecasts? Methodical guides consistently outperform traditional approaches. That same precision applies when you create a step-by-step guide for your internal processes. You can learn more about how detailed guides drive business accuracy with these market research insights.
This is where you embed your expertise directly into the workflow.
Adding elements like tips, warnings, and personal insights can dramatically improve how useful your guide is. Here’s a quick breakdown of a few key features and the value they add.
Enhancement Features and Their Impact
Enhancement Feature | Description | Primary Benefit |
|---|---|---|
Expert Tips | Add a "Pro Tip" block to share shortcuts or best practices. | Empowers users with advanced knowledge, helping them work more efficiently. |
Warnings & Cautions | Insert a highlighted "Warning" for steps with irreversible consequences. | Prevents common mistakes and reduces the risk of errors. |
Personal Insights | Share a brief anecdote about why a certain step is important. | Adds a human touch and helps users understand the "why" behind the process. |
By layering these elements into your AI-generated draft, you’re not just documenting a process; you’re coaching someone through it. You’re anticipating their questions, warning them about potential pitfalls, and sharing wisdom that makes their job easier.
This human touch is what makes your guide a trusted resource that people will actually use again and again.
Creating a brilliant, refined guide is only half the battle. If your team or clients can't find it when they need it, all that effort goes to waste.
The final, most critical step is getting your guide into the right hands. This isn’t just about sending a link; it's about building a reliable knowledge system that ends the guesswork for good.
Choosing the Right Publishing Destination
Where your guide lives determines who can see it and how they find it. The right choice depends entirely on your audience. An internal process for your team has very different needs than a customer-facing tutorial.
Branded Knowledge Hub: This is perfect for internal teams. A central hub acts as a single source of truth, gathering all your SOPs in one searchable, branded space. It finally replaces scattered docs in shared drives and ensures everyone is working from the same playbook.
Custom Domain: For a polished client experience, publishing guides to a custom domain is the way to go. It reinforces your brand and presents your documentation as a professional resource, not just an afterthought.
Think of it this way: the internal hub is your team's private library. The custom domain is your public, client-facing resource center.
Hosted Pages vs. Simple Links
Once you’ve picked a destination, you need to decide how to share the guide itself. You have two main options, and knowing when to use each is key.
Sharing Method | Best For | Why It Works |
|---|---|---|
Beautiful Hosted Page | Onboarding new clients, formal training, and customer support articles. | Offers a rich, interactive, and branded experience that feels like a polished product. |
Simple, Versatile Link | Quick answers in chat, embedding in project tools, and ad-hoc support. | Provides instant, direct access to the exact steps needed without any extra navigation. |
Using a beautiful hosted page makes a strong first impression. In contrast, a simple link offers speed and utility for everyday questions. A great system lets you do both, adapting your delivery to the situation.
For more ideas on structuring content effectively, our complete tutorial on how to create a step-by-step guide offers deeper insights.
Building a Living Library
The real goal here is to move beyond one-off documents and create a living, breathing library of processes. This is how you escape the chaos of outdated files and "tribal knowledge" that only lives in one person's head.
An organized library ensures every guide is easy to find, always up-to-date, and accessible on any device. When you update a process because a tool changed, everyone with the link automatically gets the latest version. No more resending files or worrying about people using old instructions.
By organizing your guides into a searchable library, you're not just sharing information; you're building a scalable operational asset. This system reduces repetitive questions and gives your team and clients the autonomy to solve problems on their own.
This approach transforms your documentation from a static archive into a dynamic, reliable resource that drives consistency across your entire organization. It’s the final piece of the puzzle in creating guides that actually get used.
Measuring Success and Keeping Your Guides Alive
A guide’s journey doesn’t end the moment you hit “publish.” In fact, that’s just the beginning. The most effective guides are living documents that evolve with your team, your tools, and your customers.
To create a step-by-step guide that remains a cornerstone of your organization, you need to treat it like one. That means measuring its performance, gathering feedback, and building a culture of continuous improvement around your documentation.
Using Analytics to See What Works
Guesswork won't get you very far. The only way to know if your guide is truly effective is to look at the data. Modern guide creation platforms give you a clear window into how people are actually interacting with your content.
These aren't just vanity metrics. They’re direct indicators of your guide's health and usefulness.
Key metrics to keep an eye on include:
Total Views and Unique Users: This tells you who is accessing the guide and how often. Are the right teams actually using it?
Completion Rates: Are people making it all the way to the final step? A big drop-off might signal that the process is too long or a specific step is a major roadblock.
User Hotspots: Heatmap-style analytics can show you where users spend the most time, highlighting potential areas of confusion or complexity in your workflow.
These data points help you move from just creating guides to optimizing them based on real-world behavior.
Fostering a Collaborative Documentation Culture
The best way to keep guides from becoming outdated is to empower the people who use them every day to contribute. Static documents create a bottleneck, forcing every single update through one person. A collaborative platform, on the other hand, turns your entire team into process experts.
This is where features like real-time co-editing and contextual comments become so valuable. When a team member spots a step that's changed or has an idea for a better way to explain something, they can leave a comment right there on that part of the guide.
A collaborative improvement loop transforms documentation from a top-down chore into a shared team asset. It ensures your guides reflect how work actually gets done, not just how it was once designed.
This approach has a massive impact. For example, when one support team turned its tribal knowledge into a living library, it slashed training time from four weeks to just ten days—a 75% reduction. Interactive guides can also shorten new hire onboarding by 50% and speed up issue resolutions by 35%. You can explore more about how data-driven processes transform business operations in other areas, too.
By inviting teammates to co-edit and give feedback, you build a system where guides stay accurate and relevant almost effortlessly. This continuous cycle is what keeps your documentation alive and ensures it remains a true source of efficiency for your entire organization.
Of course. Here is the rewritten section, crafted to match the human-written, expert tone and style of the provided examples.
A Few Questions That Always Come Up
Even with a better way to create guides, a few questions tend to pop up. Let's tackle them head-on, because the answers help clarify why this approach actually works when others haven't.
What’s the “Right” Length for a Guide?
People often ask how long a guide should be. The honest answer? As long as it needs to be, and not a single step longer.
If you find yourself documenting a massive, sprawling workflow, that’s a sign you’re trying to solve too many problems at once. The fix is to break it down. Create several smaller, focused guides that connect to each other. This keeps each guide digestible and centered on one clear outcome.
How Do You Keep Guides From Going Stale?
This is the big one. What’s the secret to keeping guides updated when processes are constantly changing?
The key is to stop treating your guides like static files and start treating them like living documents. When you use a platform built for collaboration, team members can flag outdated steps or suggest edits right inside the guide the moment they spot a change.
The best practice here is to assign clear "process owners." These are the people responsible for reviewing specific guides on a regular schedule—say, once a quarter. This simple habit prevents your documentation from ever becoming irrelevant.
Can You Use This for Customer Support?
Absolutely. In fact, this is one of the most powerful ways to use it. Taking a screen recording of a common customer task and turning it into a polished, interactive guide can slash onboarding time and help users solve problems on their own.
When you publish these guides on a custom domain, you create a professional, branded help center. Customers get the answers they need instantly, which dramatically reduces the load on your support team and makes your entire product experience feel better.
Ready to stop creating guides that collect digital dust? With Build a Guide, you can turn any screen recording into an interactive, AI-powered guide that your team will actually use. Start building your living SOP library today at https://buildaguide.app.