
January 27, 2026
How to Create a Step by Step Guide People Actually Use

Tired of guides that gather dust? Learn how to create a step by step guide that teams and clients will actually use to get results. Actionable advice included.
Let's be real: most step-by-step guides are created with the best of intentions, but they end up collecting digital dust. They become long, dense documents that nobody wants to read or can even find.
It’s not because the information is bad. It’s because the format is broken.
Why Most How-To Guides End Up Unused
Traditional guides almost always fail because they’re static, a nightmare to update, and completely disconnected from how people actually learn and work today. A wall of text in a PDF is intimidating, inefficient, and honestly, a little disrespectful of your team's time.
The Shift to Dynamic, Actionable SOPs
The secret to creating guides people actually rely on is to stop writing static documents and start creating dynamic, interactive Standard Operating Procedures (SOPs).
Instead of manually typing out every step and painstakingly taking screenshots, the modern approach uses a screen recording as the foundation. This method isn't just faster—it produces a far more engaging and useful final product.
The idea is simple: record your process once, and let smart technology handle the heavy lifting of turning it into a polished guide.
This visual flow chart breaks down the modern, three-stage approach we're going to cover.
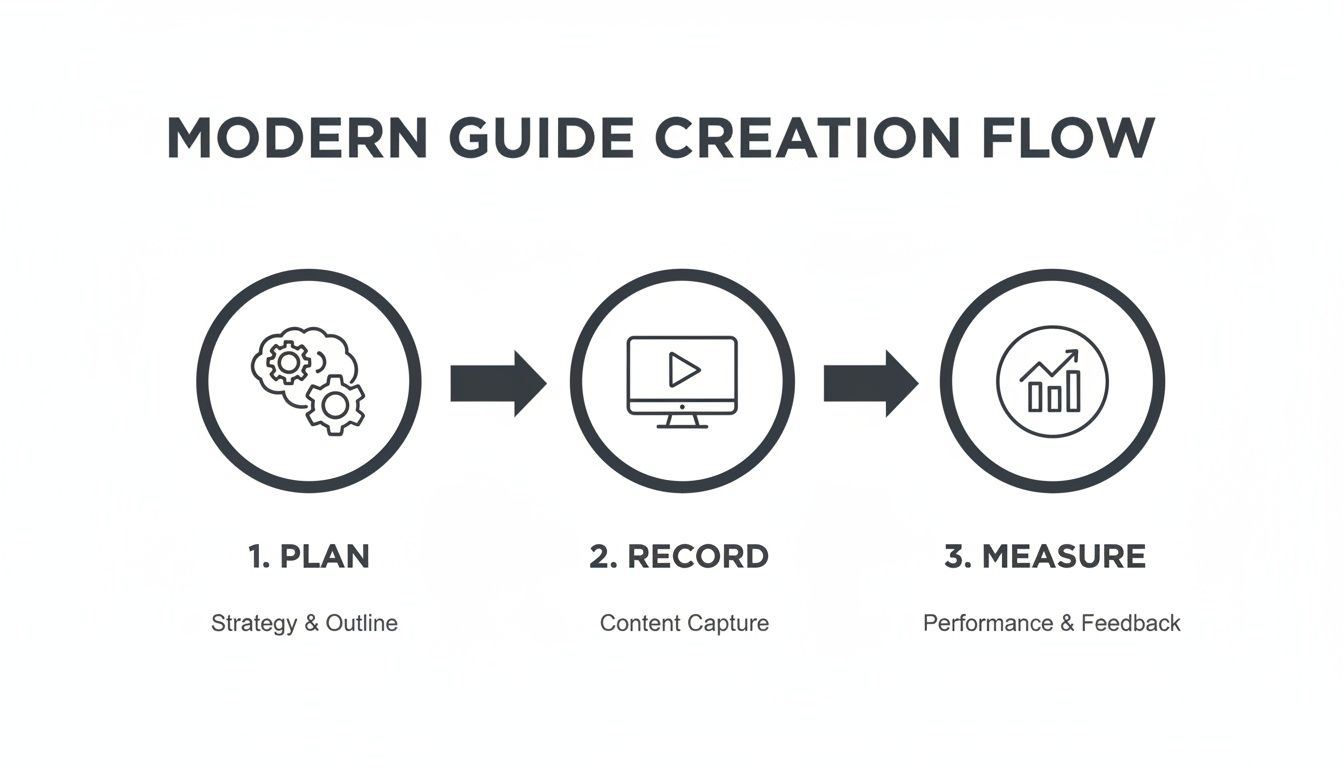
This process maps out the entire lifecycle of a guide that works, from smart planning all the way to data-driven improvements. It’s this framework that separates a useful resource from a forgotten file. We've seen countless teams make the same mistakes, which we cover in our article on the SOP mistake that makes guides useless.
To see just how different this approach is, let's compare the old way with the new way side-by-side.
Traditional Guides vs. Modern Interactive Guides
Feature | Traditional Guide (e.g., Word Doc, PDF) | Modern Interactive Guide (e.g., Build a Guide) |
|---|---|---|
Creation Method | Manual typing, copy-paste, separate screenshots | AI-powered generation from a screen recording |
Updating | Difficult and time-consuming; requires a full redo | Fast and easy; edit specific steps without re-doing |
Engagement | Low; static text and images are often ignored | High; interactive elements, video, and visuals |
Accessibility | Buried in folders, hard to search | Centralized, searchable, and shareable with a link |
Analytics | None; impossible to know if it's being used | Built-in analytics to track views and engagement |
Collaboration | Clunky version control (e.g., "final_v2.docx") | Real-time comments and collaborative editing |
The table makes it pretty clear. One method is stuck in the past, while the other is built for how modern teams actually operate.
A Framework for Guides That Work
Throughout this article, we’ll walk through an end-to-end process that turns this concept into reality. We'll go from initial strategy to capturing your workflow with AI, enriching the content with visuals and notes, and finally, measuring what actually helps your team.
The goal is to give you a reliable framework for creating guides that save time, slash errors, and make sharing knowledge feel effortless.
A great guide doesn't just list steps; it empowers someone to complete a task confidently and correctly the first time. It anticipates their questions and removes friction from their workflow.
This strategic approach is what separates documentation that gets used from documentation that gets ignored. In fact, companies with a clearly documented content strategy are over 300% more likely to report success, yet so many teams still rely on unstructured, ad-hoc methods.
This is why a modern process for creating a step-by-step guide, especially one powered by platforms like Build a Guide, is a game-changer for customer success teams, agencies, and anyone tired of repeating themselves.
Before you even think about hitting record, let’s talk about planning.
This is the part everyone wants to skip, but it’s the single biggest difference between a guide people actually use and one that just collects dust. A little bit of planning upfront saves you from creating something that solves the wrong problem for the wrong person.
What Problem Are You Actually Solving?
The whole process starts with one question: what will someone be able to do after they follow this guide?
Vague goals like "show how to use the software" are useless. You need a sharp, specific outcome. Think about the real-world impact.
Vague Goal: "Explain the invoicing process."
Sharp Objective: "Cut new hire time-to-first-invoice by 40% by standardizing the client setup process in our CRM."
See the difference? One is a task, the other is a result. This shift forces you to build something with a clear purpose. It turns a simple list of steps into a tool that improves the business.
This isn’t just feel-good advice. In the business world, a lack of clear purpose is fatal. A staggering 42% of startups fail because they build something nobody actually needs. Your guide is a product, and if it doesn't solve a real need, it will fail just the same. You can dig deeper into why this matters in this insightful analysis of startup success.
Who Is This Guide For?
Once you know your "why," you have to nail down your "who."
A guide for a brand-new, non-technical client needs to look completely different from one for a junior developer. Get this wrong, and your guide is guaranteed to miss the mark.
Think about the person on the other end:
Technical Skill: Are they a total beginner who needs every icon explained, or an expert who just needs a quick reminder?
Familiarity: Is this their first time seeing this software, or do they live in it all day?
Their Goal: Are they trying to fix something that’s broken, complete a required task, or learn a new skill?
Answering these questions tells you what to include, what to skip, and how to say it. For a beginner, you might add extra callouts explaining jargon. For an expert, you’d probably cut the intro and get straight to the advanced steps.
The best guides feel like they were written by a helpful colleague who knows exactly what you're trying to do and what you're struggling with. That only happens when you have a crystal-clear picture of your audience.
Map Out the Real Workflow
Okay, you’ve got your objective and your audience. Now, map the entire process from start to finish.
And I don't just mean the "happy path" where everything works perfectly. You need to think about the messy parts, too. What are the prerequisites? Where do people get stuck?
Imagine you’re creating a guide for setting up a new marketing campaign. Your map should include:
Prerequisites: What do they need before they even start? (e.g., approved ad copy, final images, budget codes).
Core Steps: The main sequence of actions.
Decision Points: Where might they need to choose between options? (e.g., selecting campaign type A vs. B).
Common Pitfalls: What are the most common mistakes people make? (e.g., forgetting to set an end date, targeting the wrong audience).
This map is your blueprint. It makes sure you don’t miss a critical step during the recording, which saves you from having to re-record everything later. This is the secret to creating a guide that’s both complete and genuinely easy to follow.
Capturing Your Process with Screen Recordings
Alright, this is where your plan starts to become a real, usable guide. The fastest and most honest way to document a digital workflow is to simply record your screen while you do it.
Think of that recording as your raw material. It's a perfect, real-time snapshot of the process, exactly as it happens—no guessing, no trying to remember steps from memory. This isn’t just about being quick; it's about capturing the authentic flow, including the tiny hesitations and specific clicks that text-only instructions always miss.
Best Practices for a Clean Recording
A clean recording is the secret to a great final product. The less "noise" you have in your initial video, the less cleanup work you'll have later. The goal is to perform the task smoothly, just as you'd want your team or customers to.
After countless recordings, I've learned a few things that make a huge difference:
Move Your Cursor with Purpose: Avoid frantic, shaky mouse movements. Guide the viewer's eye deliberately from one action to the next. Treat your cursor like a pointer.
Speak Your Thoughts Aloud: This is a big one. Narrate what you're doing and, more importantly, why. Explaining your clicks as you make them provides priceless context that the AI can later transcribe into clear, written steps.
Complete the Task in One Take: Whenever possible, run through the entire process without stopping. If you make a small mistake, just correct it and keep going. It’s almost always faster than trying to stitch multiple clips together later.
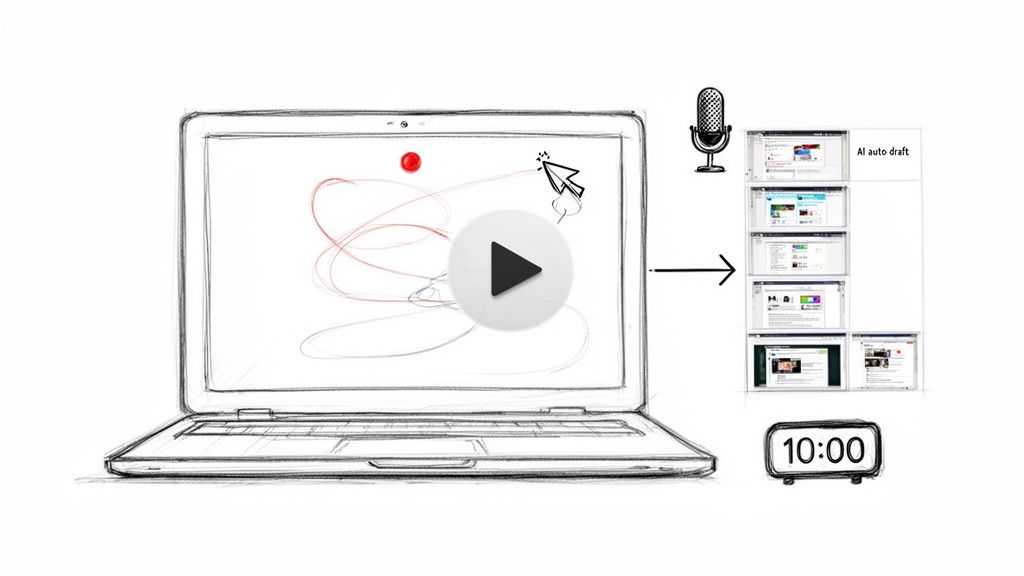
This screenshot shows you just how simple it is to get started. You're turning a quick action into a structured, reusable guide right from the beginning.

The clean layout gets straight to the point, with a clear call-to-action to begin recording your workflow.
From Video to Structured Draft with AI
Once your recording is done, the real magic happens. Modern tools use AI to analyze your video, automatically spotting every click, keystroke, and action you took. The software then instantly breaks down your recording into a sequence of individual steps.
What you get back is a structured draft, complete with cropped screenshots for each action and descriptive text. For instance, instead of you having to manually type "Click on the 'Settings' button," the tool generates that for you based on what it saw in your video.
This automated process is the single biggest time-saver. It completely eliminates the tedious, manual work of screenshotting, cropping, pasting, and writing. You get to focus purely on refining the content.
Imagine an operations manager recording a 10-minute software setup. Documenting that the old way would be a half-day project, minimum. With this method, they can record the task and have a nearly complete SOP draft in minutes. It turns a dreaded task into a quick win.
The Speed and Accuracy Advantage
This approach completely changes the effort required to create step-by-step documentation. Well-structured how-to guides can be created in under 5 minutes, slashing traditional documentation time by 90%. Before this technology became widely available in 2023, manually creating a guide often took 4-6 hours and, according to industry benchmarks, led to 35% error rates.
This efficiency makes it possible for busy support teams and consultants to document processes on the fly. You no longer have to choose between helping a client and creating the guide—you can do both at once.
The best part is that by recording a real workflow, you're building a foundation of accuracy that’s tough to achieve any other way. We're big believers in this philosophy; you can learn more about it in our article on how to record once and guide forever. This first draft, generated in just a few minutes, is the perfect starting point for the next phase: making it even better.
Refining Your Guide for Ultimate Clarity
An AI-generated draft is a fantastic starting point. It gets the raw clicks and actions down. But that first pass is rarely the finished product. This is where you, the human expert, step in to transform a functional draft into something genuinely helpful.
It's all about adding the "why" to the "what."
The AI captures the literal sequence of events. Your job is to inject the context, nuance, and personality that a machine can't. This is what makes a guide feel trustworthy and easy to follow.
Merging and Splitting for a Better Flow
Not all actions are created equal. Sometimes, the AI will break a single, fluid motion into several tiny steps, making the process feel clunky. Other times, it might group several distinct decisions into one confusing step. Your first job is to fix the rhythm.
Look for opportunities to combine rapid-fire clicks into a single, logical action. For example, three separate steps like "Click File," then "Click Export," then "Click PDF" can be merged into one clean instruction: "Export the document by going to File > Export > PDF."
This small tweak makes a huge difference. The guide starts to feel less robotic and more like how a person actually thinks through a task.
Rewriting for Your Brand Voice
The text generated by an AI is functional, but it's usually generic. Now’s the time to make it sound like it came from you. Are you writing for a friendly startup or a formal enterprise client? The words you choose matter.
Adjust the tone: Turn "User must now input credentials" into "Next, just pop in your login details."
Add helpful context: Don't just say "Enable two-factor authentication." Explain why. Add, "To keep your account secure, enable two-factor authentication. This adds an extra layer of protection."
Kill ambiguity: AI might describe a button as "Click the blue button." Make it specific: "Click the blue 'Submit Application' button at the bottom of the page."
The goal is simple: write as if you're talking to a colleague. Use clear, conversational language. It builds trust and makes the process feel approachable, which is exactly what you want in a guide people will actually use.
Enriching Steps with Powerful Additions
A great guide does more than just list steps; it anticipates questions and adds value along the way. This is where you can turn a simple checklist into a truly comprehensive resource. Think beyond basic text and screenshots.
Here are a few things that work really well:
Callouts for Emphasis: Use "Pro Tip" or "Warning" boxes to highlight shortcuts, best practices, or common pitfalls. This grabs the reader's attention for things they can't afford to miss.
Checklists for Complex Steps: If a single step involves multiple sub-tasks (like gathering documents before you start), embed a checklist. It helps users track their progress and ensures nothing gets forgotten.
Annotated Screenshots: A well-placed arrow, box, or blur effect on a screenshot is often clearer than a whole paragraph of text. Use them to pinpoint exact locations or redact sensitive info.
These small additions add layers of clarity that cater to different needs, making your guide more robust and user-friendly.
Collaborating for Accuracy
No guide should be created in a vacuum. Before hitting publish, it’s critical to get a second set of eyes on it. A modern platform makes this easy with built-in collaboration.
Invite a teammate or a subject matter expert to review the guide right in the editor. They can leave comments on specific steps, suggest wording changes, and catch errors you might have glossed over.
A developer might spot a technical inaccuracy, while a support agent can point out the exact step where customers always get stuck. This collaborative review is the final quality check that takes a guide from "good" to "flawless" and is a key part of learning how to create a step-by-step guide that truly works.
Sharing Your Guide Where It Will Be Seen
Creating a clear, refined guide is a huge accomplishment, but it’s only half the battle. A brilliant guide is useless if it's buried in a forgotten folder or lost in a sea of emails. The final, critical step is getting your work in front of the right people, at the exact moment they need it.
This isn’t just about sending a link. It’s about strategically placing your guide into your audience's natural workflow. The goal is to make access so frictionless and intuitive that consulting your documentation becomes a reflex, not a chore.
Creating a Centralized Knowledge Hub
For internal teams, scattered documents are a productivity killer. The most effective strategy is to create a single source of truth—a branded knowledge hub where all your step-by-step guides live. This isn't just a shared drive; it's a searchable, organized library for your company's processes.
Think of it as your internal university. When a new hire needs to learn the expense reporting process, or a sales team member needs a refresher on CRM workflows, they know exactly where to go. This approach stops the endless "Hey, can you show me how to..." questions in their tracks.
A centralized hub also ensures everyone is working from the most current information. When a process is updated, you edit the guide in one place, and everyone instantly has access to the new version.
Using a Custom Domain for a Seamless Experience
When sharing guides with clients or customers, presentation matters. Publishing your guides to a custom domain (e.g., help.yourcompany.com) offers a professional, branded experience that builds trust and feels like a natural extension of your product or service.
Instead of sending them to a third-party site with unfamiliar branding, you provide a clean, dedicated space for learning. This is especially powerful for:
Client Onboarding: A custom hub can house all the guides a new client needs to get started, creating a structured and impressive onboarding journey.
Customer Support: Link directly to specific guides from your helpdesk or in-app support chat, providing immediate, visual answers to common questions.
Product Documentation: Embed your help center directly within your SaaS application, allowing users to find answers without ever leaving your platform.
This professional polish shows you've invested in your customer's success, turning documentation from a necessary evil into a valuable feature.
Frictionless Sharing Methods That Work
Once your guide is published, you need to deliver it effectively. The best method depends entirely on the context and the audience. Your distribution strategy should be as thoughtful as the guide itself.
Your guide's value is directly tied to its accessibility. If it takes more than two clicks to find, people will default to asking a colleague, defeating the entire purpose of creating it in the first place.
Here are a few proven methods for getting your guide into the right hands:
Direct Links for Quick Answers: The simplest method. When someone asks a question in Slack or email, respond with a direct link to the relevant guide. This not only solves their immediate problem but also teaches them where to find answers in the future.
Embedding in Onboarding Emails: Integrate guides directly into your automated onboarding sequences for new hires or customers. For example, the "Day 2" email could include a guide on "Setting Up Your Email Signature."
In-App Help Center Integration: Place your knowledge hub inside your product. A small "?" icon that opens up a searchable library of guides empowers users to self-serve without derailing their workflow. This approach can significantly reduce support ticket volume.
By embedding your guides where work already happens, you create a powerful system for scalable knowledge sharing.
Using Analytics to Improve Your Guides
Hitting “publish” on a new guide feels like the finish line, but it’s really just the starting point. Think of your guide as a living document, not a static file. To make sure it stays useful, you have to understand how people actually use it in the wild.
This is where analytics come in. Without data, you’re just guessing what works. Analytics swap those assumptions for hard proof, showing you what’s helping people and—more importantly—what’s stopping them cold. It’s the only way to close the loop and make sure your guide keeps getting better over time.
Key Metrics That Actually Matter
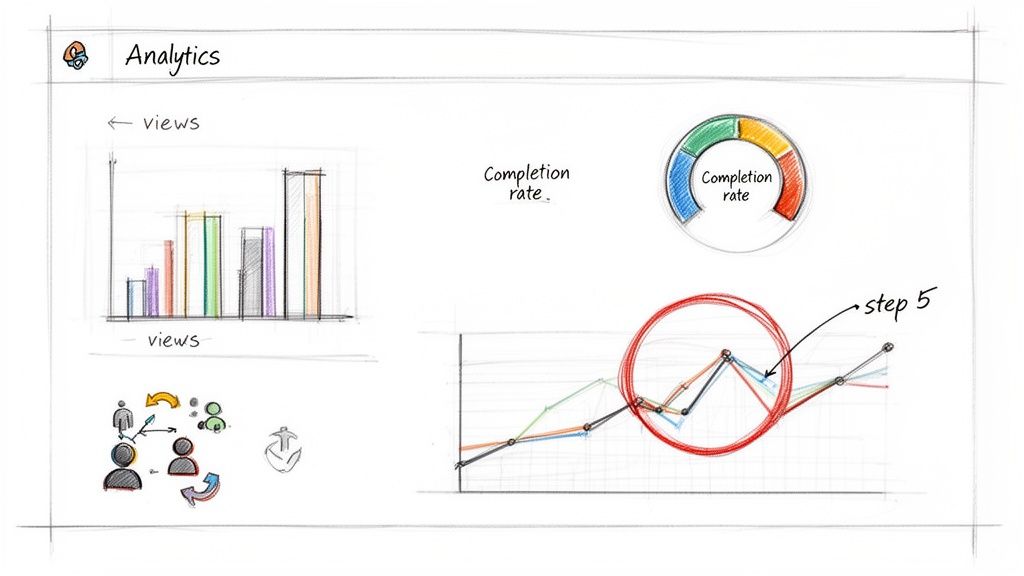
It’s easy to get distracted by vanity metrics like total views. A high view count is nice, but it tells you almost nothing about whether your guide is effective. For real insights, you need to look at metrics that reveal behavior.
Completion Rate: What percentage of people who start your guide actually make it to the end? A low completion rate is a huge red flag. It’s a sign your guide might be too long, too confusing, or just doesn't deliver what it promised.
Time Spent on Step: Where are people getting stuck? If users are spending 2-3 minutes on a step that should take 30 seconds, you’ve found a friction point. That step is probably more complex or poorly explained than you realized.
Drop-Off Points: At what exact step do most people give up and leave? When you see a huge chunk of users abandoning the guide at the same spot, you’ve found your problem area. It could be a broken link, an unclear instruction, or a step that’s just too intimidating.
Looking at this data turns you from a creator into a diagnostician. A high drop-off on step five isn't a failure—it's a bright, flashing sign telling you exactly where to focus your attention.
Turning Insights into Action
Data is useless until you do something with it. I recommend setting a simple reminder—maybe once a month—to check in on your guide’s performance and make small, targeted fixes.
For example, let's say your analytics show a massive drop-off on a step that asks users to configure a complex setting. You have a few clear options:
Rewrite the text. Ditch the jargon and simplify the language.
Add a better visual. A new, annotated screenshot or even a quick video can work wonders.
Break it down. Split that one intimidating step into three smaller, more manageable ones.
This constant cycle of review and revision is what keeps guides from going stale. It also helps prove their value. For a deeper dive into using data to measure content performance, the principles in Mastering Webinar Analytics to Maximise Marketing ROI offer a great framework, even if you're not running webinars. The core idea is the same: listen to what the data is telling you.
Questions We Hear All the Time
Even with the best process, a few practical questions always pop up. Here are the most common ones we see, along with some straight answers to keep you on track.
How Long Should a Guide Be?
The honest answer? As long as it needs to be—and not a single step longer.
Don't fixate on a specific number. Instead, focus on breaking the process down into logical, bite-sized actions. A simple task might only need five steps, while a complex software configuration could easily top thirty.
The goal is clarity and granularity. If a step feels too long or makes you explain multiple actions, that’s your cue to split it into two.
How Do I Handle Processes That Are Always Changing?
This is where static documents like PDFs completely fall apart. The only sustainable way to manage evolving processes is with a modern, cloud-based system that handles real-time edits and version control automatically.
When a process changes, you just edit the specific steps, swap out a few screenshots, and republish. The link never changes, so everyone instantly has the most current version. This "living document" approach is the only way to stay accurate without the headache of tracking down and replacing old files.
A great guide is never truly "done." It evolves alongside the process it documents, ensuring it remains a reliable source of truth for your team and customers.
Can I Put Both Video and Written Steps in the Same Guide?
You absolutely can—and you probably should. A hybrid approach almost always creates a better experience.
Many modern tools, including Build a Guide, let you embed the original screen recording right inside the step-by-step guide it generates.
This simple feature caters to how different people learn. Some will watch the video for a quick overview, while others will meticulously follow the written steps. Giving them both options makes your guide more accessible and far more effective.
Ready to stop writing guides that get ignored? Build a Guide turns your screen recordings into clear, interactive guides your team will actually use. Start creating better guides today.