
January 7, 2026
How to Create Training Videos: A Practical Guide

Learn how to create training videos that engage and educate audiences. This guide covers planning, recording, editing, and distribution for impactful results.
Creating a good training video is about more than just hitting "record." It's a structured process of planning, scripting, recording, and editing with a clear goal: teaching a specific skill or process effectively.
When you nail this, the result isn't just a video. It's a scalable resource that standardizes knowledge across your entire team.
A Modern Framework for Training Videos That Actually Work
This is a practical guide for creating training videos people actually finish. Forget the old, time-consuming methods. We're breaking down the entire process, from the first flicker of an idea to the final share, into a system built for clarity and speed.
The demand for video learning isn't just some passing trend; it's a real shift in how companies train their people. Today, video is the go-to format, with 75% of enterprise companies using it for internal training. That number makes a lot more sense when you see that organizations with solid training programs—often driven by video—report 218% higher revenue per employee. The data on video's impact on the corporate training market is pretty clear.
Mapping Your Production Workflow
The journey from an idea to a polished training video follows a straightforward, four-stage path. This workflow gives you a bird's-eye view of the core phases: Plan, Record, Edit, and Distribute.
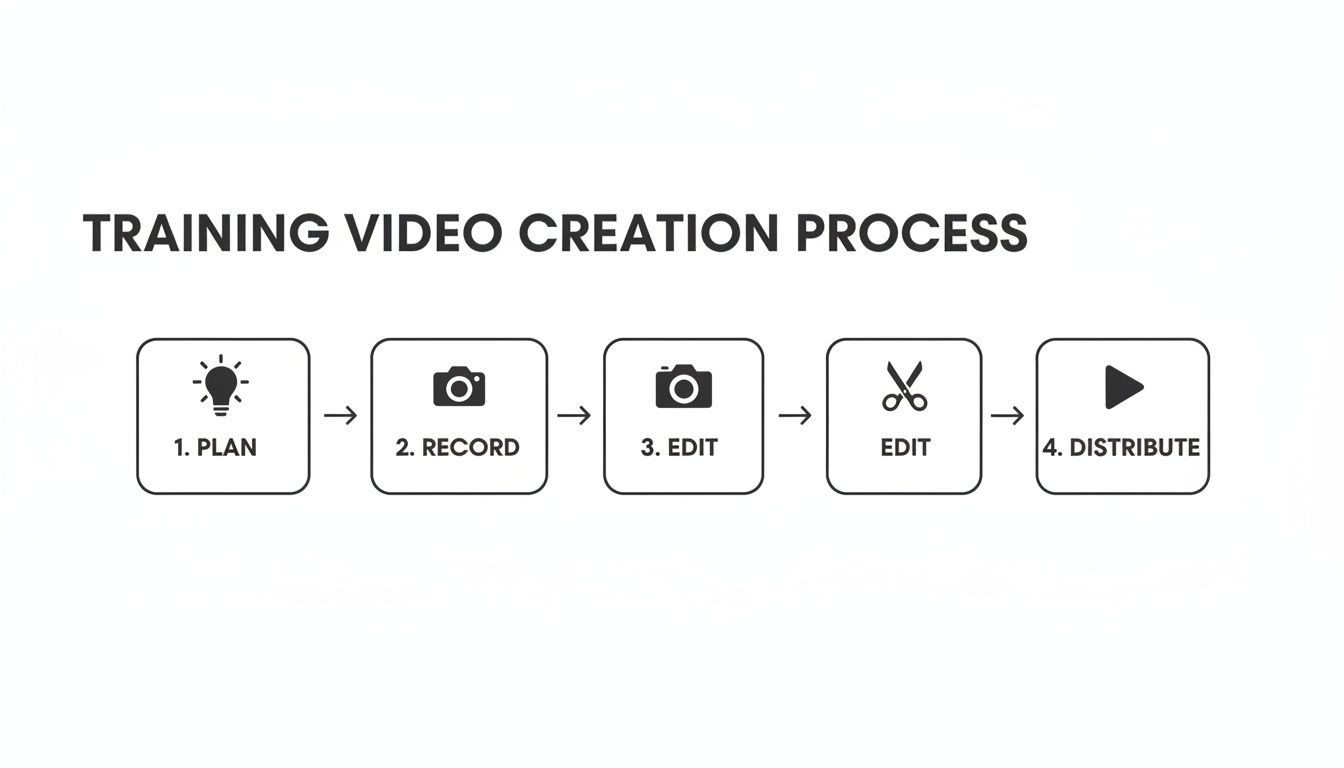
Each step logically builds on the one before it, making sure your final video is both professional and actually achieves its learning goals.
The 5 Phases of Training Video Production
Thinking about video creation in distinct phases helps demystify the entire process. Every successful creator, whether they're a solo manager or part of a big L&D team, follows a similar structure. It keeps things organized and prevents costly mistakes.
Here's a high-level look at what each phase is designed to accomplish.
Phase | Key Objective | Critical Outputs |
|---|---|---|
1. Planning & Strategy | Define what success looks like. | Clear learning objectives, audience profile, script/outline. |
2. Pre-Production | Get all your resources ready to go. | Finalized script, prepared visuals, equipment checklist. |
3. Production (Recording) | Capture all the raw visual and audio content. | Raw video footage, screen recordings, voice-over audio. |
4. Post-Production (Editing) | Assemble and polish the raw footage into a coherent story. | Edited video with graphics, captions, and balanced audio. |
5. Distribution & Analysis | Get the video to the right audience and measure its impact. | Published video, repurposed content (like interactive guides), analytics report. |
Mastering these phases turns video creation from a one-off task into a repeatable system. You'll stop just making videos and start building a scalable training engine that supports your team without draining all your time and resources.
Planning and Scripting Your Video for Maximum Clarity
An impactful training video is built on a strong foundation. Before you even think about hitting record, the work you do here determines whether your video will clarify a process or just create more confusion.
This is where you turn a good idea into a practical, teachable asset. It's the single most important step in creating training videos that actually work.
Start with Clear Learning Objectives
First things first: what should someone be able to do after watching your video? If you can’t answer that with a specific action, you’re not ready to script.
Vague goals like "understand the new software" are useless. They lead to unfocused, rambling videos that waste everyone’s time.
Get specific. A much better objective is: "After watching this video, a new sales rep will be able to log into the CRM, create a new client contact, and schedule a follow-up task." See the difference? That clear destination gives your video a purpose.
Your learning objective is the promise you make to your viewer. A strong, action-oriented objective ensures you deliver on that promise by focusing your content on what truly matters.
This laser-focused approach helps you cut out the fluff and respect your team’s time. Every scene and every line of narration should directly support that one goal.
Know Your Audience Inside and Out
Who is this video for? The answer completely changes your tone, language, and how deep you need to go. A training video is never a one-size-fits-all product.
Think about who you’re talking to and what they already know (or don’t know).
New Hires: They need the basics. They don't know your company’s jargon, so your tone should be welcoming and you need to explain concepts from the ground up. Assume nothing.
Seasoned Employees: They have context. You can use internal terms and jump straight to the point about a new process or tool update without covering what they already know.
Clients or Customers: They're outsiders. They don’t care about your internal workflows; they just want to know how a feature solves their problem. Keep the language benefit-focused and free of company acronyms.
Putting yourself in their shoes is the key to creating a resource they’ll find genuinely helpful, not just another corporate video they have to watch.
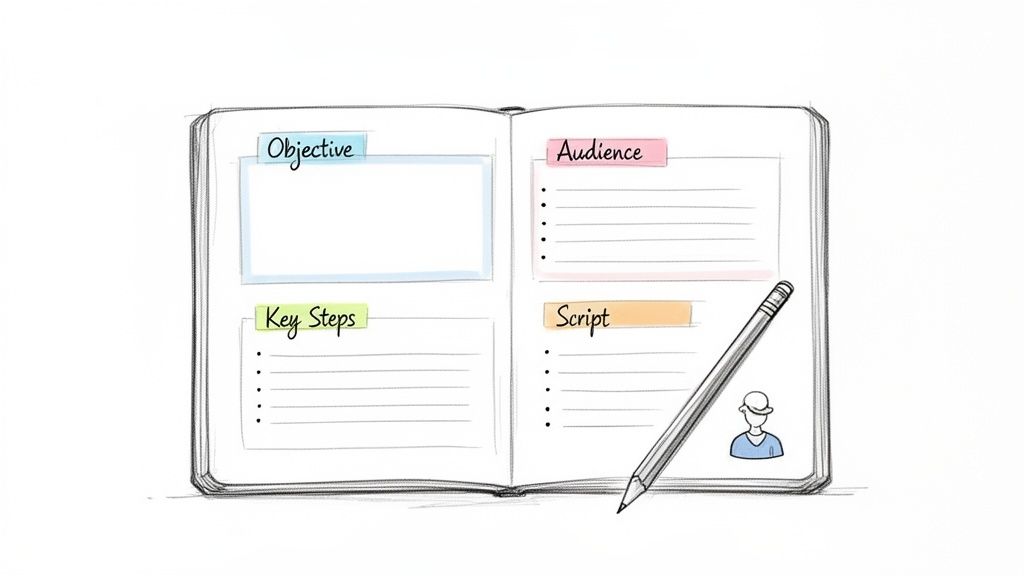
Outline Your Content Logically
With your objective and audience locked in, it’s time to structure the video. An outline is your blueprint, making sure the video flows in a way that’s easy to follow.
You don't need anything complicated. A simple, effective structure works almost every time:
The Hook (Intro): State the problem and what they'll learn. Example: "In the next three minutes, you'll learn exactly how to submit an expense report without any errors."
The Core Steps (Demonstration): Walk through the process step-by-step. This is the real “how-to” part. Break down anything complex into smaller, more manageable chunks.
The Summary (Conclusion): Quickly recap the key steps and reinforce the main takeaway. You can also point them to another resource if it makes sense.
This simple framework gives your video a narrative arc that guides the viewer smoothly from start to finish.
Choose Your Scripting Style
Finally, it’s time to write. The style you choose depends on the video's complexity and how comfortable you are just talking through a process. There's no single right way.
Word-for-Word Script
This is best for technical or compliance-heavy topics where every word matters.
Pros | Cons |
|---|---|
Ensures precision and accuracy. | Can sound robotic if not delivered naturally. |
Reduces mistakes during recording. | Time-consuming to write. |
Ideal for complex or regulated topics. | Leaves little room for spontaneous personality. |
Bulleted Outline (Talking Points)
This style feels more natural and conversational. It’s perfect for informal demos or updates.
Pros | Cons |
|---|---|
Allows for a more natural, conversational tone. | Higher risk of forgetting key points. |
Faster to prepare than a full script. | Can lead to rambling if you're not careful. |
Great for simple walkthroughs. | Requires more confidence from the presenter. |
Whichever style you choose, always read it out loud before you record. This simple check helps you catch awkward phrasing and trim down jargon.
The goal is to sound like a helpful colleague explaining something clearly, not like you're reading from a manual. This planning is the secret to making videos that are not only informative but also genuinely engaging.
Choosing Your Gear and Recording with Confidence
With your plan and script ready, it's time to hit record. This is where you capture the raw footage, and it’s way less intimidating than it sounds. You don’t need a Hollywood budget or a film degree to create a training video that looks and sounds professional.
Success here really just comes down to a few smart choices about your gear and your recording space. Let's break down the technical side so you can focus on delivering great content.
Assembling Your Essential Gear
Forget about complicated, expensive setups. For most training videos, especially anything involving a screen recording, a few simple pieces of equipment are all you need. The goal here is clarity, not cinematic perfection.
Your essential toolkit really only has three parts:
Reliable Screen Recording Software: This is your main tool for capturing software demos or process walkthroughs. You’ve got options ranging from free tools like QuickTime on a Mac or the Xbox Game Bar on Windows to more advanced platforms. For the smoothest workflow, a tool with a browser extension like Build a Guide is perfect, because it doesn’t just record—it starts the process of turning your video into an interactive guide.
A Quality Microphone: Audio quality is non-negotiable. People will forgive slightly blurry video, but they will click away instantly from tinny, muffled, or scratchy audio. A simple USB microphone or even a lavalier mic that clips to your shirt is a huge upgrade over your computer’s built-in mic.
Simple Lighting: No, you don't need a professional lighting rig. A basic ring light behind your webcam or just facing a window with good natural light can make a massive difference if you're on camera. Good lighting gets rid of distracting shadows and makes everything look much more polished.
The single biggest mistake you can make is skimping on audio. Clear, crisp sound makes your training feel professional and authoritative. Bad audio instantly kills your credibility. If you’re going to invest in one thing, make it a decent microphone.
Preparing Your Recording Space
Once your gear is set, take a few minutes to prep your environment. A clean, quiet space is critical for a smooth recording session. A little prep work here will save you a ton of editing time later.
Start with your digital workspace. Close any apps you don't need and, most importantly, turn off notifications to avoid those distracting pop-ups. If you're recording your screen, clean up your desktop by hiding icons and picking a neutral, professional wallpaper.
Next, look at your physical space. Find a quiet room where you won't be interrupted. Simple things like closing the door, silencing your phone, and letting your team know you're recording can make a huge difference. If you're in a room with a bit of an echo, throwing a few pillows or blankets on the furniture can help absorb the sound.
Best Practices for Recording
Okay, your gear is ready and your space is prepped. It's time to record. Whether you’re on camera or just capturing your screen, a few simple techniques will elevate the final quality of your video.
For Screen Recordings
Move Your Mouse Deliberately: Your cursor is the viewer's guide. Avoid jerky, frantic movements. Move with purpose and pause for a second over the elements you're talking about.
Use Zoom and Annotation: To highlight a specific part of the screen, use your software’s zoom or callout features. It’s so much more effective than saying, "now look at that tiny button in the top right corner." You’re showing them exactly where to look.
Speak as You Click: Narrate your actions as you do them. For instance, say, "Next, I'm going to click on the 'Settings' menu," right as you move the mouse to click it. This keeps your audio and video perfectly in sync.
For On-Camera Recordings
Look at the Lens: This one feels a little unnatural at first, but looking directly into the camera lens is the digital version of making eye contact. It’s a simple trick that builds a much stronger connection with your audience.
Speak Clearly and with Energy: Your voice is your most powerful tool. Speak a little slower than you normally would and make sure to enunciate. Most importantly, bring some energy! If you sound bored, your audience definitely will be.
Streamlining Your Editing with a Smarter Workflow
Editing is where your raw footage transforms into a polished, professional training asset. This post-production phase doesn't have to be a complicated, time-consuming chore. With a smart workflow and the right tools, you can assemble your video efficiently and make it shine.

This is your chance to clean up mistakes, add clarifying elements, and ensure the final product is easy to follow. A great edit respects the viewer’s time by making the content as clear and concise as possible.
Mastering the Editing Fundamentals
Before you jump into fancy tools, every great training video needs a solid foundation. Your first pass of the edit should focus on creating a clean and coherent narrative.
Your initial goal is simple: trim the fat. Cut out any mistakes, long pauses, or moments where you stumbled over your words. It’s a simple step that instantly makes your video feel more professional and focused.
Once you have a clean rough cut, think about the flow. Simple transitions, like a basic fade or cut, are usually all you need to move smoothly between different sections. Over-the-top effects can be distracting, so less is often more.
The Rise of AI in Video Editing
Editing, alongside filming and scripting, has always been one of the most time-consuming parts of video production. But modern AI tools are changing the game. Imagine slashing your production time from 13 days down to just 5—a 62% reduction. That’s the kind of impact AI-powered platforms are having by tackling bottlenecks like tedious manual edits.
These smart tools can automatically handle tasks that used to take hours.
Filler Word Removal: AI can detect and instantly remove "ums," "ahs," and other verbal stumbles, cleaning up your audio track in seconds.
Automatic Captions: Generating accurate, time-synced captions is crucial for accessibility. AI transcription is now incredibly precise, saving you the manual effort.
Silence Removal: Some tools can automatically shorten or remove long pauses, tightening the pace of your video and keeping viewers engaged.
Adopting an AI-assisted workflow isn't just about saving time—it's about reallocating your energy from tedious manual tasks to strategic improvements. You can spend more time refining the content and less time on repetitive edits.
This technology allows you to produce higher-quality training content faster, making it feasible for any team to create videos consistently.
Enhancing Your Video with On-Screen Elements
A clean edit is good, but adding visual aids can make your training video great. On-screen graphics and callouts help reinforce key information and direct the viewer's attention exactly where it needs to be.
Use these elements thoughtfully to improve comprehension without cluttering the screen.
Text Callouts and Annotations: Use these to highlight specific buttons, menu items, or important text on the screen. It’s far more effective than just describing it.
Zoom and Pan Effects: Gently zooming in on a crucial area of the screen helps focus the viewer’s attention, especially in complex software demonstrations.
Branding Elements: Add your company logo as a subtle watermark and use consistent brand colors for your on-screen text. This creates a cohesive and professional viewing experience.
These additions act as signposts for your audience, guiding them through the process and ensuring they don't miss critical steps. The goal is to make the information as digestible as possible.
The power of a single recording can extend far beyond the video itself. Instead of just editing a video, think about how that recording can become a living document. You can learn more about the "record once, guide forever" philosophy that turns video assets into reusable, interactive guides. This approach maximizes the value of every second of footage you capture.
By combining foundational editing techniques with the power of AI and thoughtful on-screen graphics, you can create training videos that are not only informative but also polished and engaging.
Turning Your Video into an Interactive Guide
A finished video isn’t the end of the line. It's an asset, and you can make it work a lot harder for your team. Instead of letting your hard work gather dust in a video library, you can transform it into an interactive, step-by-step guide.
This is a huge shift in how modern teams think about training. We're moving beyond passive viewing and into active learning, which helps knowledge actually stick. The idea is simple: take that screen recording and break it down into a dynamic Standard Operating Procedure (SOP).
This multi-format approach gives your content a much longer shelf life and delivers way more value over time.
From Video to Actionable Steps
Modern documentation platforms can automate this entire process. Instead of you manually pausing a video, taking screenshots, and writing out instructions, these tools analyze your recording and do all the heavy lifting.
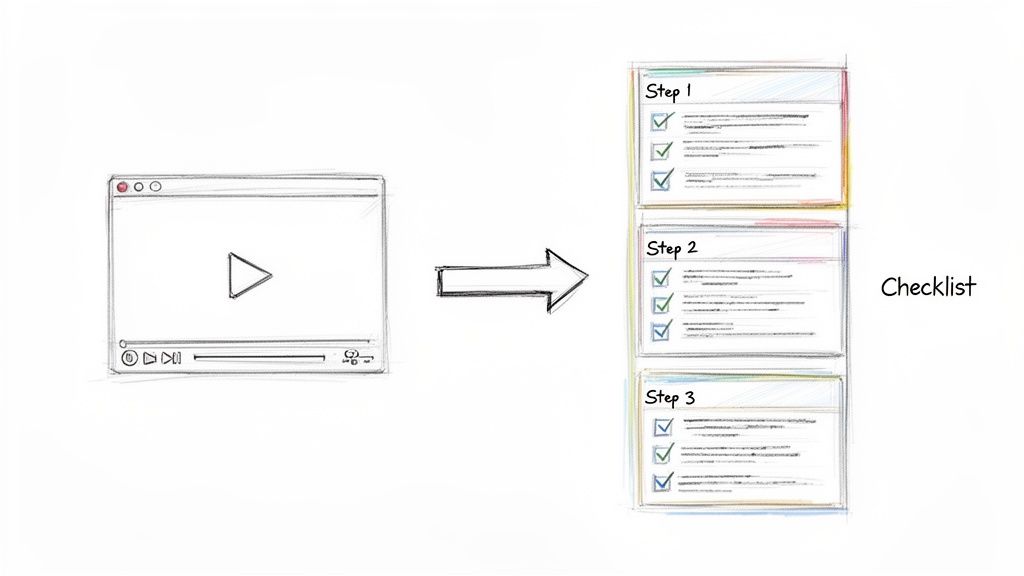
Here’s what you typically get from a single video recording:
Sequential Screenshots: The AI grabs a clear screenshot for every single action you take, creating a perfect visual map of the process.
Written Instructions: It automatically writes out the text for each step to match the screenshot (like, "Click on the 'File' menu").
Annotated Callouts: To make things crystal clear, the system adds visual cues like highlights or numbered circles right on the screenshots, showing exactly where to click.
This gives you an incredible head start. What used to take hours of tedious work—capturing, cropping, annotating, and writing—can now be done in minutes. You get a solid foundation for a comprehensive guide, ready for you to polish.
Here’s an example of how a tool like Build a Guide presents this automated output.
As you can see, the AI has already broken the workflow into clean, manageable steps with both images and text. Now, the real work begins.
Refining and Enhancing Your Guide
The automated draft is just the starting point. The real magic happens when you refine and add your own context, turning a simple walkthrough into a rich learning resource. This is where your expertise adds the nuance that automation can't.
You can easily tweak the auto-generated text to use your company's specific terminology or add a crucial warning. For instance, if a step is a common trip-up point, you can add a note like, "Be sure to select 'Save as New Template' to avoid overwriting the original."
But you can go way beyond simple text edits:
Add detailed notes under specific steps to explain the "why" behind an action.
Incorporate checklists for complex processes to ensure nothing gets missed.
Merge or split steps to better match the logical flow of the task.
By transforming a single video into an interactive guide, you cater to everyone. Visual learners have the video, readers can scan the text and screenshots, and hands-on learners can follow the checklist as they perform the task.
This approach creates a robust knowledge library that supports your team far more effectively than video alone. Creating a step-by-step guide is one of the most efficient ways to document processes. If you want to dive deeper, you can explore how to create a step-by-step guide from scratch in our detailed article.
This method ensures consistency, empowers your team with self-serve resources, and makes that initial video investment work much harder for you. The result is a system of documentation that is easy to create, update, and—most importantly—actually use.
Distributing and Measuring Your Training Content
You’ve finished the video. Great. But you’re only halfway there.
A perfect training video that no one can find is just a file taking up space. And if you can't tell whether it's actually helping anyone, you have no idea if your effort was worth it. This is where you turn your recording into a real business asset.
Now it’s time to get it in front of the right people, and then figure out what's working and what isn't.
Choosing the Right Home for Your Video
Where your video lives dictates who sees it and what you can learn from their viewing habits. The right choice comes down to your audience, plain and simple.
Internal Knowledge Base or Wiki: This is the default for most internal process tutorials, like "how to submit expenses." It keeps everything secure, centralized, and searchable for your team.
Learning Management System (LMS): If your video is part of a more structured training program, like employee onboarding or a certification course, an LMS is the way to go. It lets you track completions and build out formal learning paths.
Public Platforms (YouTube/Vimeo): Perfect for product demos or tutorials meant for customers. These platforms give you broad reach and simple sharing, but you'll want to be careful with any sensitive company info.
No matter where you put it, give your video a clear, descriptive title and a solid description. Think about what your team member or customer would actually type into a search bar to find it.
Digging into Analytics That Matter
A high view count feels nice, but it tells you almost nothing about whether the training was effective. To understand the real impact and justify the time spent, you have to look at how people engaged with the content.
Don't get caught up in vanity metrics. The real story is in viewer behavior—what they watched, what they re-watched, and where they gave up and closed the tab.
This data is your roadmap for making the next video even better.
Here are the numbers that actually count:
Metric | What It Tells You | Why It Matters |
|---|---|---|
Completion Rate | The percentage of people who watched the whole thing. | A low rate is a huge red flag. Your video is likely too long, confusing, or just boring. |
Engagement Hotspots | The parts of the video people re-watch the most. | This either highlights an incredibly valuable tip or a step that's really confusing. |
Viewer Drop-off Points | The exact moments where viewers en masse decide they're done. | This pinpoints a dull section, a technical glitch, or an explanation that's way too complex. |
This isn't just about grading your video; it's about making your entire training process smarter. The insights you gain here are invaluable, especially when converting video into other formats. If that’s on your radar, check out our guide on how to create training manuals that work alongside your videos.
By paying attention to what the numbers are telling you, you ensure your training efforts aren't just seen—they're actually valuable.
Common Questions About Creating Training Videos
Even with a solid plan, you're going to hit a few snags. It happens to everyone. Specific questions almost always pop up during the video creation process, and knowing the answers ahead of time can save you a ton of headaches.
Here are a few of the most common hurdles I've seen teams face—and how to clear them.
How Long Should a Training Video Be?
It should almost always be shorter than you think.
The sweet spot for most topics is 3-7 minutes. This isn't just a random number; it's based on how people actually learn and retain information. Anything longer, and you start seeing engagement drop off a cliff.
If you have a complex process that takes, say, 20 minutes to explain, don't make a 20-minute video. That’s a recipe for glazed-over eyes. Instead, break it into a series of shorter, laser-focused videos. This makes the content far more digestible and lets people jump straight to the part they need later on.
What Is the Easiest Screen Recording Software?
For a quick, one-off recording, the tools built right into your computer—like QuickTime on a Mac or the Xbox Game Bar on Windows—can get the job done. They’re free and already there. No harm in starting with them.
But if you're creating training materials regularly, you'll want a more dedicated workflow. A platform with a browser extension is usually the fastest way to go.
The real magic isn't just in the recording. Modern tools can take that video and instantly start converting it into an interactive, step-by-step guide. This single feature can cut your documentation time in half, since you’re not manually screenshotting and writing out every single action.
How Can I Make My Videos More Engaging?
Engagement isn't about fancy graphics or a huge production budget. It comes down to two things: clear content and a human touch.
Speak conversationally, like you're explaining it to a coworker sitting next to you. Bring some energy to your voice. Use simple on-screen elements like text callouts or quick zooms to draw attention to exactly what you’re clicking on.
But the most important thing? Make every second count. Your video should be a direct, no-fluff solution to a specific problem. When a viewer sees that you're respecting their time and giving them exactly what they need, they'll stick around.
Turn your screen recordings into polished, interactive SOPs automatically with Build a Guide. Start creating your first guide for free.